Monday, September 30, 2013

Chicken Saltimboca

                  If you want more magical mom stuff, please like us on Facebook here!


A few weeks ago I was watching The Chew and they were having a cook off between 3 audience members and one of them made this dish (or very similar).  When it was on I wrote it down but do you think I saved it HA! Nope!  I remember saying to myself "that is so easy, I can just remember that."  So I created this from memory and even if it wasn't the exact same, it was still delicious.  
Ingredients:
  • 4 Small Boneless Chicken Breasts
  • Black Pepper
  • 4 Thin Slices of Provolone
  • 4 Slices of Prosciutto
  • 4 Sage Leaves
  • 3/4 Cup of White Wine
  • 1 1/2 Cups Chicken Broth
Serves 4

Preheat oven to 375.  Place piece of provolone on each piece of chicken.  Top cheese with 1 sage leaf and then tightly wrap the whole piece of chicken with a slice of prosciutto and place it in a glass baking dish.

 Next pour the white wine and chicken broth in the bottom of the dish.  Sprinkle with pepper.  Bake for 25 minutes or until prosciutto gets crispy.

I served this Mushroom Risotto and Oven Roasted Asparagus
Follow the Magical Moms on Facebook and Pinterest for weekly menu ideas, crafts, and Disney Magic.  

Weeknight Crispy Chicken Pasta & Strawberry Orange Spinach Salad

I've been debating for a while on what to call this. I got my inspiration from Chicken Parmesan, but needed something that I could cook in a much shorter amount of time.  I almost called it Chicken Parmesan casserole, but figured the name would turn my kids off to it. For this dish I used precooked frozen chicken tenders to make it a quick weeknight meal. The key to making this dish cook so quickly is "pre-cooking" the meat. It's going to sound like a ridiculous process, but trust me it gets done a lot faster this way:)

Ingredients:
10 oz. of uncooked rotini or penne pasta (I use the veggie kind to hide some nutrition)
1 Tbsp. Butter
1/4 cup diced onion
1 clove minced garlic
4 frozen chicken tenders (the kind you get precooked in a bag)
1 jar spaghetti or marinar sauce
1/2 cup shredded mozzarella
1/4 cup shredded parmesan

Start off by getting your pasta water boiling. Then chop up your onions and heat up the butter in a skillet on medium and cook the onions until they are translucent and some start to turn brown. Meanwhile add your pasta to or of water once it starts to boil.

Now for the chicken...to get the chicken to cook fast, place it on a microwave safe place and cook for 1.5 minutes. These speeds up the cooking time by a lot! Then place in oven at 400 for about 7 minutes to get it crispy. We don't want to wait to cook this in the oven with the whole meal put together because again, it will take too long. Using the microwave and stovetop will allow us to just be able to broil the finished meal for 3 minutes. You're really just using the time it takes to boil the pasta to heat the chicken quickly. Now you can add the garlic to your onions and cook about 3 minutes then turn to low.

About the time is your pasta is done, you're chicken can come out of the oven. Leave the oven on so it stays hot for the finished product. Slice the chicken tenders and add them to the skillet with the onions and garlic.

Turn back up to medium high and cook the chicken for 3-4 minutes to get even crispier. While it looks like a lot, this whole process up to now should only have taken 10-15 minutes.  Reduce the heat on the skillet to medium. Add your sauce to the skillet, again just long enough to heat it thoroughly.

Drain your pasta and mix the sauce and chicken mix to the pasta in a large bowl and toss around to coat the pasta in the sauce. Add about half of the mozzarella and Parmesan to the bowl and stir. Pour into a 2 quart oven safe dish, top with the remaining cheese and stick in the oven. Turn your oven to broil and cook just until the cheese starts to brown.

For the salad, I really can't even call this a recipe. While I do love to make my own salad dressings and such, I'm trying to throw this entire meal together in about 20 minutes, so I'm using  jarred dressing and canned fruit!

Strawberry Orange Spinach Salad (just use the desired amount of each for the number of people eating the salad):
Baby spinach
Mandarin oranges (the canned kind)
Pine nuts
Gorgonzola or mozzarella cheese
Strawberry vinaigrette (could also use a raspberry dressing and change the name to Raspberry Orange Spinach Salad)

Mix all the ingredients in a bowl and toss just before serving. Enjoy!

Clean Banana Bread

I have been using the same banana bread recipe for several years.  It is a family favorite so I was very hesitant to try anything different.  Every time I make it I think about subbing in different ingredients to try to make it healthier.  I had a couple of very ripe bananas, so today is the day!  I could have started simple and just traded out the oil for applesauce, but instead I decided to really overhaul it!  This recipe has no sugar and no oil and uses whole wheat flour instead of all purpose flour.

Ingredients:
  • 2-3 (depending on size) Bananas- mashed
  • 3/4 Cup Honey
  • 2 Eggs
  • 2 Cups of Whole Wheat Flour
  • 3/4 teaspoon Cinnamon
  • 1 teaspoons Baking Soda
  • 1/4 teaspoon Salt
  • 1/2 Cup of Sugar Free Apple Sauce

Makes one loaf

Preheat the oven to 350.  In a large bowl combine flour, salt, cinnamon, and baking soda.  In a medium bowl beat 2 eggs.  To the eggs add the applesauce and honey.  Stir until combined. Add the mashed bananas and gently stir.   Then pour the batter into a lightly greased loaf pan.  Bake for 55-60 minutes or until you can insert a toothpick in the center and it comes out clean.  Let bread sit in pan for 10 minutes then flip the pan over to remove the bread and let it cool on a wire rack.

Pizza Steak Burger

If you want more magical mom stuff, please like us on Facebook here!

I recently saw a pizza burger recipe over on the Pioneer Woman's blog and that reminded me of this sandwich I used to love as a kid that was served at a local root beer stand here in Cincinnati. Unlike the Pioneer Woman's recipe, this one was very basic and didn't have all the toppings like hers did. It also had the cheese inside the burger, not just on top. I figured a plain version would be more kid friendly in my house, and it wanted to try putting the cheese on the inside. I'm not a huge fan of Italian sausage so I use regular breakfast sausage instead and I always use ground sirloin instead of ground beef because it is lower in fat.

Ingredients:
1 lb. ground sirloin
1/2 lb. sausage
1 packet of Italian dressing mix
Butter
1/4 cup diced onions
Sliced provolone or mozzarella
Pizza sauce (I use a local one from LaRosa's)
Kaiser rolls from a bakery
Any preferred toppings (I top mine with a few onions, pickle slices and a tiny bit of mayo)

Mix your sirloin, sausage and Italian dressing packet together in large bowl. Prepare a spot for your burgers on the counter by placing wax paper on your counter. Take a small ball of the meat mixture in your hand and shape into a thin patty. Place a slice of cheese or two on top, then top it with another thin patty. Keep doing this until all your meat is used.

I'm making these in a large skillet inside on my stove,  but you can cook on your outside grill. If cooking inside, my trick for some of the best tasting burgers is to cook diced onions in some butter until the onions are carmelized. I then cook the burgers on top of the caramelized onions. To caramelized the onions, you'll want to cook them over medium heat until the onions not only become translucent, but start to turn brown. Since you diced the onions, they will shrivel up to the point where you'll barely even notice them after you cook the burgers. If you're grilling outside you'll skip this step.

Cook the burgers to your desired done ness, and remove from heat. Split your kaiser rolls  and stick in a 400 degree oven for just a few minutes. Warm the pizza sauce, then assemble your burgers on the rolls with the pizza sauce and any toppings you prefer. Serve with a delicious salad and dinner is done!

Spaghetti Lasagna with Garlic Cheese Toast

Spaghetti is one of the few meals that I can count on all 3 of my kids getting excited about. I try to change it up and sometimes they like the changes, sometimes they don't. This is one of the changes they enjoy and it allows me and my husband a change to the plain old boring spaghetti routine. You get a lot of the flavor of lasagna, but in an easy weeknight dinner meal.

Ingredients:
1/2 lb. ground sirloin/beef or turkey
1/2 lb. sausage (I use regular sausage but you can use Italian sausage
Spaghetti noodles
Jar of your favorite spaghetti sauce
8 oz. ricotta cheese
Parmesan cheese

It's pretty simple, you just make like you would spaghetti... Cook noodles according to package directions, brown the beef and sausage until done... then add the sauce and ricotta to the meat mixture and cook over medium low until bubbly. Serve the sauce over the spaghetti noodles and sprinkle with cheese. 20 minutes cooking time but with all the flavor of lasagna!

For the Garlic Cheese Toast:
French bread slices
Butter, room temp
Garlic powder
Shredded mozzarella
Parmesan
Paprika

Butter the bread slices, sprinkle with garlic powder, top with desired amount of cheeses and sprinkle with paprika. Bake at 400 for 10 minutes. Use it to slop up all that yummy sauce.

Sunday, September 29, 2013

Classic Pork Tenderloin with finishing sauce

If you want more magical mom stuff, please like us on Facebook here!

We were supposed to go to the local high school football game this evening, but it looks like it is going to rain so we are going to be stuck inside tonight.  I guess I will make dinner... I thought I had the night off:) What do I have to work with.... a pork tenderloin... fresh green beans... and potatoes. I can do this!

Ingredients:
  • 1 1/2 lb Pork Tenderloin
  • 2 Tablespoons Worcestershire Sauce
  • 1/3 Cup Soy Sauce
  • 2 teaspoons Minced Garlic
  • 1/4 Cup Red Wine Vinegar
  • 1 1/2 teaspoons Dry Mustard
  • 2 Tablespoons Lemon Juice
  • 1/4 teaspoon Black Pepper
  • 1/2 Cup Olive Oil
  • 1 Tablespoon of Butter
  • 1 teaspoon Cornstarch
  • 2/3 Cup of Chicken Broth
Serves 6

To make the marinade whisk together Olive Oil, Red Wine Vinegar, Lemon Juice, Minced Garlic, Worcestershire Sauce, Soy Sauce, dry mustard, and pepper.  Reserve a 1/2 cup of the marinade for sauce.  Pour marinade over pork and place in the fridge for about 3 hours
Preheat oven to 350.  Place pork tenderloin in Cast Iron Dutch Oven (link for the one I use) or other stove to oven safe pan.  Sear on all sides.  Leave tenderloin in Dutch Oven and bake for 35-40 minutes or until internal temperature reaches 160 degrees.  Remove from oven.  Place pork on platter and cover with foil.  Let rest for 5 minutes before slicing.  Place Dutch Oven back on the stove.  Add the reserved 1/2 of marinade and 1/3 cup of chicken broth.   The marinade and the pork juices and bits will form the sauce for the pork.  Whisk 1 teaspoon of cornstarch in the remaining 1/3 cup of chicken broth.  Add that along with 1 tablespoon of butter to mixture in Dutch Oven.  Bring mixture back to a boil stirring throughout.  Slice pork and drizzle sauce on top.  

I served this with Lawry's Potato Squares and Oven Roasted Green Beans

Chicken Corn Chowder

                If you want more magical mom stuff, please like us on Facebook here!

I know that Sherrie made a corn chowder last week that her husband absolutely LOVED, my husband is a little skeptical of it because he has never had it before (and neither have I) but what's not to love... bacon, chicken, corn, potato... It all sounds good to me!  My mother-in-law has been asking me to make it for awhile and she saw Sherrie's Recipe (because she is a devoted Magical Mom follower) and said that this was the one she wanted to try.  Sherrie included lots of tips and tricks in her recipe that I used. The biggest difference is that I am adding chicken to mine.  We had our Slow Cooker 8 Spice Lemon Chicken earlier this week and there is some left over so I figured it would be the perfect time to try Sherrie's recipe.


Ingredients:
  • About 1 1/2 Cups of Rotisserie Chicken (shredded)
  • 4 Slices of Bacon (cooked and chopped)
  • 1 Small Sweet Onion (finely diced)
  • Olive Oil
  • 4 Idaho Potatoes (peeled)
  • 1 Can of Cream Corn
  • 1 Can of Cream of Chicken Soup
  • 1 Cube Chicken Bouillon
  • 1 teaspoon Cajun Seasoning
  • 3 Cups of Milk (I used 1%)
  • 1 Cup of Water
  • Salt and Pepper to taste
Serves 6+

In a large pot drizzle a little bit of olive oil and heat.  Add onion and cook until they start to become soft.  Peel potatoes.  I took Sherrie's advice and quartered them and placed them in my Pampered Chef Manual Food Processor to chop them very small.  The smaller pieces allow for the soup to cook quicker and gives a great consistency to the soup.

Shred the chicken.
Add bacon, cream corn, cream of chicken soup, potatoes, chicken, bouillon cube, and cajun seasoning.  Stir to combine.
Pour in milk and water and stir.  Heat over medium heat stirring occasionally.  When soup is heated through reduce to low and simmer for about 30 minutes stirring often.

Friday, September 27, 2013

Spicy Chipotle Shrimp

If you want more magical mom stuff, please like us on Facebook here!

The marinade for this shrimp has just the right amount of spice and heat to make it different from any of our other shrimp recipes.  One trick I have learned is that Chipotles in Adobo Sauce can be frozen so if you buy a can and only use a few place the remaining peppers and sauce in a freezer bag and place them in the freezer.  

Ingredients:
  • 1 lb Shrimp (cleaned and deveined)
  • 1 Clove of Garlic (minced)
  • 2 Tablespoons Lime Juice
  • 3 Tablespoons of Honey
  • 2 Chipotles in Adobo Sauce
  • 1/4 Cup Olive Oil
Combine all ingredients except shrimp in small food processor.  Process until smooth
Place shrimp in ziploc bag and pour marinade over.  Place in fridge for about 30 minutes
Skewer shrimp
Grill 2-3 minutes on each side or until shrimp are pink in color.
ENJOY!!

Thursday, September 26, 2013

Cowboy Breakfast Casserole

If you want more magical mom stuff, please like us on Facebook here!

I love having easy breakfast options for everyone in the fridge. I prefer a hot breakfast instead of cold cereal. But it's just too expensive to buy those frozen breakfast options, so I prefer to make something up ahead of time and just keep in the fridge so we can just heat up a portion throughout the week. And this breakfast certainly satisfies that! You could make it if you were hosting a large breakfast or brunch, but I like to keep it all to myself and eat for a week on it!

Ingredients:
Bag of frozen Potatoes O'brien (frozen hash browns with onions and potatoes already in it)
1/2 lb. sausage, browned and crumbled
1/4 cup diced sweet onion
1.5 cups heavy cream
1 cup shredded cheddar
1/2 cup shredded Parmesan
1 tsp salt
1/2 tsp. pepper

Preheat your oven to 350 degrees. After browning your sausage, mix all the ingredients in a large bowl. Spray a large casserole dish with cooking spray. Place mixture in a casserole dish and cook for 50-60 minutes.

Like I said, I make this ahead of time to serve throughout the week, so I let it cool on the stovetop, then stick a lid on it and place in the fridge. Then I heat up single servings in the microwave and serve with a little hot sauce. So good!

Quick, Easy, and Inexpensive Halloween Crafts

If you want more magical mom stuff, please like us on Facebook here!

I wanted to make some crafts with supplies that I already had, but since I LOVE the craft store I decided I was willing to buy a few things to complete them.  I ended up spending less than $6.00 and made these cute decorations.  Get creative and have FUN!  Oh and drink a bottle of wine while you do it... you will need an empty bottle!


Supplies I Bought:
  • $1.99 Bag of Google Eyes (the one that comes with a variety of sizes)
  • $1.00 Small Wood Frame
  • $0.45 Letters E E K
  • $1.00 Small Chalkboard Frame
  • $0.99 Sparkly Tree Branch
  • $0.49 White Crepe Paper
Total $5.92

Supplies I Had on Hand:
  • Wine Bottle
  • Purple Paint
  • Black Paint
  • Green Paint
  • Orange Paint
  • White Paint
  • Scrap Ribbon
  • Glue
  • Random Jars
  • White Chalk
  • Spider Sticker 
  • Spider Web Place Mat
  • Tape
** You can use what ever color paint you have on hand or you can buy acrylic paint for about $0.59 each.


EEK Googly Eye Picture Frame
First I painted the picture frame a lime green color and the letters orange.  After they dried, I attached the piece of ribbon, letters, and googly eyes with glue.  Last, I added a SUPER cute picture of my son in his Halloween costume!


The Witch is IN Chalkboard
First I painted the chalkboard purple and let it dry.  I lightly wrote on the chalkboard in pencil what I wanted it to say so that I had a guide.  Then I used white paint (you could use the chalk) to trace the writing. I actually glued the piece of chalk to the frame because the witch is ALWAYS in!  Next I added a piece of scrap ribbon and a Halloween sticker.  Last I dipped my finger lightly into the black paint and gently rubbed it in to the frame to give it more of a worn look.  

Mummy Jars
I chose three different sizes of jars.  A jelly jar, an olive jar, and a quart size Mason jar.  First I took a very long piece of the white crepe paper and crumbled it up just a little bit to give it a more mummy like look.  Then I just began wrapping it around until it was all covered.  I taped down the ends and even tied on a few extra pieces.  Last I glued on a pair of googly eyes.  I plan on placing FLAMELESS tea lights in them to let them glow at night.  
Now that you have finished that bottle of wine you can stick the sparkly glitter branch in it and your display is complete!

be sure to check out some of our other Halloween Ideas
Pretty Pretty Pumpkins
Pumpkin Playdoh Party Favors
Free! Chalkboard Halloween Printables
Free Halloween Chevron

Perfect Potato Skins

If you want more magical mom stuff, please like us on Facebook here!

Potatoes are our side dish of choice in our house. I know potatoes have gotten a bad rep because of the amount of cards in them, but they are still a healthy and nutritious vegetable that are a great choice for a complex carb. Now of course I am loading them with bacon, cheese and sour cream in this particular recipe, so don't expect this version of potatoes to be all that healthy! You can of course use low fat cheese and sour cream to make it much more friendly on your waist! Several months ago Tracy posted a recipe for BBQ Chicken Potato Skins that are great for a main course, so check those out as well. These are just your basic potato skin, but baked instead of fried.

Ingredients:

  • 4 Idaho potatoes
  • Butter
  • Shredded cheddar
  • Bacon, cooked and chopped
  • Green onions, sliced small
  • Sour cream


I cook my potatoes in the microwave for about 8 minutes, just until slightly soft when pressed with your thumb, but not soft like a baked potato. Let them cool completely. Once cool, cut in half lengthwise and scoop the bulk of the inside of the potato out. Save this for a future potato dish later in the week. Cut the halves in half again and brush the entire potato with melted butter then top with cheese and bacon. Stick in your oven and cook 10-15 minutes or until your cheese is nice and bubbly. Top with green onions and serve with sour cream.

Tonight I served these with Sweet and Spicy Chicken Sliders.

Sweet and Spicy Chicken Sliders

If you want more magical mom stuff, please like us on Facebook here!

I don't know about you, but my family doesn't like to repeat meals often. Unless it's spaghetti or tacos, I can usually only get away with making a meal every couple months. Plus I like to make new things so I can share with our readers! But I don't always like to reinvent the wheel, sometimes it's just finding a different way to prepare he same ingredients. Like this meal, my Sweet and Spicy Chicken Sliders. I'm taking basically the same ingredients from our Sweet and Spicy Bacon Wrapped Chicken, but turning them into tiny bite size sliders. They really aren't a whole lot of work but they are definitely a lot of flavor!

Ingredients:
3 large chicken breasts
1 Tbsp. Cajun seasoning
1 tsp. cayenne pepper
Salt and pepper
2 Tbsp. Brown sugar
12 slices bacon
Provolone or preferred sliced cheese
Hawaiian rolls
Preferred toppings

Start off by pounding your chicken breasts into thin pieces. Then cut each chicken breast into quarters. I trim off some of the pieces so they will nicely fit on the rolls and then cook the leftover pieces and store in the fridge for some crazy leftover dish my husband can create another day. Then season the chicken with Cajun seasoning, cayenne and salt and pepper.muse more or less to suit your taste. The cayenne pepper is very spicy, so if you're not big on spice, use a lot less or none at all. Store in the fridge until you're ready to grill.

Next cut your bacon slices in half and cook until crispy. Keep the bacon grease to cook the chicken in. You can use the same pan, but I like to use my grill pan, so I pour the bacon grease onto the grill pan. Heat the grill pan (or keep the same pan) at medium heat. Place your little chicken breasts and cook a few minutes each side or until chicken is cooked thoroughly. Sprinkle with brown sugar and cook just until the sugar melts into a glaze. Place a bacon slice or two on top of the chicken, then top with cheese. Cut your cheese slices if necessary so they aren't bigger then your little chicken breasts. Cook until they are melted.

Cook the Hawaiian rolls per package directions. Let cool slightly then cut them in half with a good bread knife. Serve the mini chicken breasts with cheese on a roll topped with a few slices of bacon. Add any condiments or toppings you prefer.

Tonight I kept the bar food theme and served these with Perfect Potato Skins. Yum!

Zucchini Fritters

If you want more magical mom stuff, please like us on Facebook here!

This is definitely my new favorite zucchini recipe.  It's so easy and everyone loved it.  I grew up eating fried zucchini and I make it for my family now, but this is way LESS mess and according to the non-veggie lovers of my family "it's not slimy"  So it is a Win-Win situation for me!

Ingredients:
  • 1 1/2 Cups Grated Zucchini
  • 2 Tablespoons Finely Chopped Onion
  • Vegetable Oil
  • 1 Egg
  • 1/2 Cup Flour
  • 1/8 teaspoon Garlic Powder
  • 1/4 Teaspoon Salt 
  • 1/8 teaspoon Pepper
  • 1/8 teaspoon Cayenne Pepper
  • 1/2 teaspoon Baking Powder
This made 10 fritters.  

Dipping Sauce
Ingredients:
  • 1/2 Cup of Mayonnaise
  • 1 Tablespoon Key Lime Juice
  • 1/4 teaspoon Cayenne Pepper
For sauce, combine all ingredients in a small bowl and mix well.  Refrigerate until ready to use. 

In a medium bowl, combine grated zucchini and finely diced onion.  In a separate bowl lightly beat 1 egg.  In another bowl, mix together flour, garlic powder, salt, pepper, cayenne pepper, and baking powder.  
Add egg to zucchini and mix well.  Next, stir in flour mixture.
In a large skillet, heat vegetable oil.  When oil is hot form the zucchini into small patties and gently place them in the oil.
Cook for about 2 minutes or until a nice golden brown and then flip.
When they are cooked crisp on both sides, remove them from oil and place on a plate lined with a paper towel.  The paper towel will absorb any extra oil.
Then serve hot with the creamy lime dipping sauce.  YUM!

Wednesday, September 25, 2013

Super Shells and Cheese

I have seen a recipe floating around Pinterest for Macaroni and Cheese that you cook the pasta in milk instead of boiling it in water.  And of course do you think I could find it when I was looking for it...NOPE!  I am pretty sure that I pinned it at one point, but I have thousands of pins and not a lot of time. I decided to wing it and it turned out pretty darn good!  This dish tastes like baked mac and cheese because it is thick and dense, but you don't have to spend the time baking it.  I served this with Kickin' Baked Chicken and Zucchini Fritters.  

Ingredients:
  • 1 Cup Shredded Monterey Jack Cheese 
  • 1 Cup Shredded Sharp Cheddar
  • 2 Tablespoons Mascarpone
  • 3 Cups Uncooked Small Shell Macaroni
  • 3 3/4 Cups Skim Milk
  • 1/4 teaspoon Dry Mustard
  • 1 teaspoon Salt (you might want more)
In a large sauce pan combine milk and pasta and bring to a simmer.  Reduce heat to low and continue to cook for about 15 minutes or until pasta is cooked tender.  

Add in cheese, salt, dry mustard, and cayenne pepper.  Stir.  Cover and let sit for 2 minutes.  Remove lid and stir again.

I think that it will be best when eaten fresh, but I plan on eating some of the leftover tomorrow so I will let you know how that is too.

Kickin' Baked Chicken

If you want more magical mom stuff, please like us on Facebook here!

I feel like I could name almost every dish that I make "Sweet and Spicy" something or other so I had a tough time coming up with a name for this.  I thought I would wait until after dinner to decide and as I was eating the chicken it was clear that it was different from sweet and spicy... it was KICKIN'!  I served it with Super Shells and Cheese and Zucchini Fritters.

Ingredients:
  • 4 Chicken Breasts
  • 1 teaspoon Smoked Paprika
  • 3 Tablespoons Brown Sugar
  • 3/4 teaspoon Salt
  • 1/4 teaspoon Dried Oregano
  • 1/4 teaspoon Pepper
  • 1/4 teaspoon Garlic Powder
  • 1/2 teaspoon Cumin
In a bowl, combine all ingredients except chicken and mix well.  Pound chicken breasts to flatten them a little bit.  Dip each piece of chicken in the spice mixture until coated.  Place in baking dish.  

I usually do this about 30 minutes before I want to cook and place them in the fridge to let the flavors soak in a bit.  Then I preheat oven to 425 degrees and bake the chicken for about 20-25 minutes
Follow the Magical Moms on Facebook and Pinterest for weekly menu ideas, crafts, and Disney Magic.

Cheesy Caprese Garlic Bread

My stomach is growling as I write this and look at the picture!  I could make a meal out of this alone... maybe I will make it for lunch today.  I served this last night with Creamy Spinach Tortellini, both of these were new creations for me and both will definitely go on my "must make again" list!  We love bread at our house.  It's one of my personal weaknesses and this one is no exception.  The cheesy,garlicy, goodness is DELICIOUS!

Ingredients:
  • 1 Small Loaf of French Bread
  • About 6 Fresh Basil Leaves cut into small strips
  • 3/4 teaspoon Minced Garlic
  • 2 Tablespoons of Butter
  • 4 Slices of Mozzarella
  • 8 Cherry Tomatoes or 1 Roma Tomato (sliced)
  • Salt and Pepper
  • Balsamic Glaze (to drizzle on top)
Preheat oven to 400 degrees.  Cut loaf of bread in half lengthwise and place on baking sheet with the cut side up.  In a small bowl mix minced garlic and melted butter together.  Using a basting brush coat each piece of bread with the garlic butter mixture.  Top each piece of bread with cheese slices and bake for about 10 minutes or until cheese is melted.  Remove bread from oven and top with tomatoes and basil.  Lightly sprinkle with salt and pepper, drizzle balsamic glaze on top and put back in oven for about one minute.  I do this because I don't want my tomatoes cold.  I think it makes them blend together perfectly!

Tuesday, September 24, 2013

Creamy Spinach Tortellini

This was the perfect weeknight meal.  It was quick and easy.  I didn't get home until 5:30 and about 25 minutes later we were eating a FANTASTIC dinner!

Ingredients:
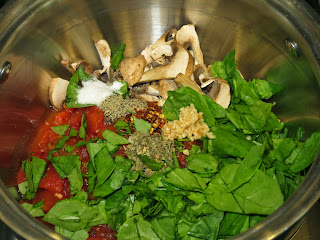
  • 1 (16 oz) Bag of Cheese Tortellini
  • 1 (14.5 oz) Can of Diced Tomatoes with garlic and onion
  • 1 Cup Portabello Mushrooms (sliced)
  • 1 1/2 Cups of Baby Spinach (roughly chopped)
  • 1/2 teaspoon Salt
  • 1/4 teaspoon Pepper
  • 1/2  teaspoon Dried Basil 
  • 1 Clove of Garlic (minced)
  • 3/4 Cup Milk
  • 2 Tablespoons Flour
  • 3/4 Cup Heavy Cream
  • 1/4 Cup Parmesan Cheese (grated)
  • 1/4 teaspoon Crushed Red Pepper
Bring a large pot of water to a boil and cook tortellini according to package.
In a separate pot combine tomatoes, salt, pepper, basil, garlic, mushrooms, and crushed red pepper and heat until bubbly.

In a bowl, whisk together heavy cream, milk, and flour.  Add to sauce pan with tomatoes.  Stir to combine.

  Next stir in the parmesan cheese.  Heat thoroughly over medium heat, reduce heat to low and simmer about 4 minutes as sauce thickens.  

Drain tortellini, but do not rinse.  Return tortellini to pot and top with sauce.  I didn't pour all the sauce on top I let my family top with more if they desired.  The kids like less than the adults.

I served with Cheesy Caprese Garlic Bread.

Mickey Wreath

If you want more magical mom stuff, please like us on Facebook here!

It is officially fall now so I can finally hang up my newest Disney project.  This wreath was so simple to make...I just might make one for every season!

Materials Needed:
  • 1- 18" Grapevine Wreath
  • 2- 6" Grapevine Wreaths
  • Various fall floral picks
  • 2- 24" pieces of ribbon
  • Craft/Floral Wire 
  • Hot Glue Gun
The instructions are pretty basic, attach the smaller ear pieces to the larger head piece with craft/floral wire.  I used green wire because that is what I already had and just tried to hide it in the vines.  Then position the various leaves, berries, and pumpkin picks in the wreath.  You can attach them with hot glue or  just stick them in so you can change them out for the different seasons or holidays.  Then I took two pieces of ribbon and tied them in a bow together and used another small piece of wire to attach the bow.  Last, I added a piece of wire to the top to hang it on my door.  


Invitation to Disney World


I am always planning my next Disney vacation.  Even if I don't have a trip booked I still follow all the deals, news, and promotions because we just never know when we will decide to go.  My kids often hear Sherrie and I discussing our future (and often non-existent) Disney plans so I am not sure I will never be able to pull off a surprise trip.  My husband is a huge supporter of my Disney World addiction so he doesn't mind our conversations or the research.
 
 My husband and I have decided to take a (sort of) last minute trip to Disney World and we thought that since we didn't have to keep it a secret very long maybe... just maybe... we could keep it a secret.  Well, it is killing me!  I am so excited for my youngest to go because he is FINALLY tall enough to ride Star Tours!  He has been begging to ride it forever!  I have decided to send a letter to the house from Mickey Mouse inviting the boys to come for a visit.  They are going to be SO excited!

To print the image, right click on it and save it as a picture.  Then select size to print.

After we gave them the letter from Mickey, they immediately wanted to head there but they settled for just dressing up for a bit!


Be sure to check out our Disney Trip - Free Scrapbook Kit